

Friends Roster – Presubmit, Continuous Integration, Deployment And Hosting
This is the continuation of “how I built the Friends Roster app” saga. If you missed the previous parts in this series, do check them out — part 1, part 2, part 3, part 4, part 5, part 6, part 7, part 8 and part 9. I know it must be getting pretty boring reading about the app for so long. But I promise this is the last one in the series.
So far I have an app that can run both on android and on the web all from one code base. I have a lot of tests to make sure I don't break anything. The code coverage is good too. Now how do I make sure I maintain the same quality in the future too? And how about hosting the web app somewhere other than localhost so I can access it from anywhere in the world? Lets find out.
Presubmit checks
After writing all the tests, I wanted to make sure I always run tests before checking in my code to git repo. Thankfully git has a nifty feature to solve this use case. Enter githooks. I wanted my presubmit code to be also checked into git repo. So I created a new directory called .githooks in the root directory of my project. Then I created a pre-commit file under .githooks. The pre-commit code does the following before checking in my code
- Run
flutter formatto automatically format my code - Run
flutter analyzeto check for any lint errors like unused imports - Runs all my unit tests and widget tests and make sure they pass
- Run all integration tests
- Builds the app to make sure that release build does not fail
Here is the code in case you'd like to use something similar in your project.
#!/usr/bin/env bash

exit_with_code() {
  eval $1
  if [ $? -ne 0 ]; then
    printf "\e[31;1m%s\e[0m\n" "$3"
    git stash pop -q
    exit $2
  fi
}

# stash any unstaged changes
git stash -q --keep-index

exit_with_code 'flutter format --set-exit-if-changed .' 1 'Formatting on some files have changed'
exit_with_code 'flutter analyze' 2 'Found lint errors'
exit_with_code 'flutter test --test-randomize-ordering-seed=random' 3 'Unit/widget tests failed'
exit_with_code './run-integration-tests.sh' 4 'Integration tests failed'
exit_with_code 'flutter build web' 5 'Building web app failed'
exit_with_code 'flutter build apk' 6 'Building android app failed'

git stash pop -q
exit 0
The pre-commit takes about 4 minutes to run on my machine, but that is certainly a reasonable trade-off for a healthy code base. One thing to note is that .git/config has to be modified to pickup the location of .githhooks.
Hosting
I install the android app on my phone via adb. So I decided not to launch the app in play store. It is a pain to release and maintain it there. For the web, I decided to use Firebase hosting. Since I was using a Firebase project to store that call history, I used the same project to do the hosting. Firebase hosting is quite simple to use and I have my app running on the web so I can access it from anywhere.
#!/usr/bin/env bash
flutter build web
mkdir -p public
rm -rf public/*
cp -r build/web public/
firebase deploy
Continuous Integration and Continuous Deployment
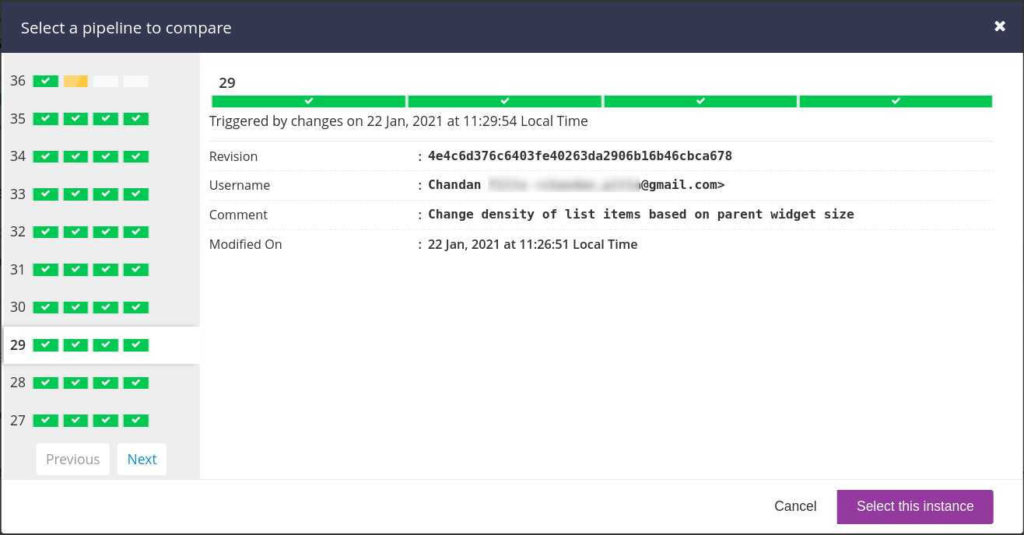
So you might have heard about CI/CD if you worked as a software engineer for any length of time. Basically anytime I checkin my code to git, CI/CD will merge my changes, run all the tests and deploy the latest code. I chose GoCD for this purpose. It is a free open source server that I can run locally. The setup takes some effort but it isn't too bad.
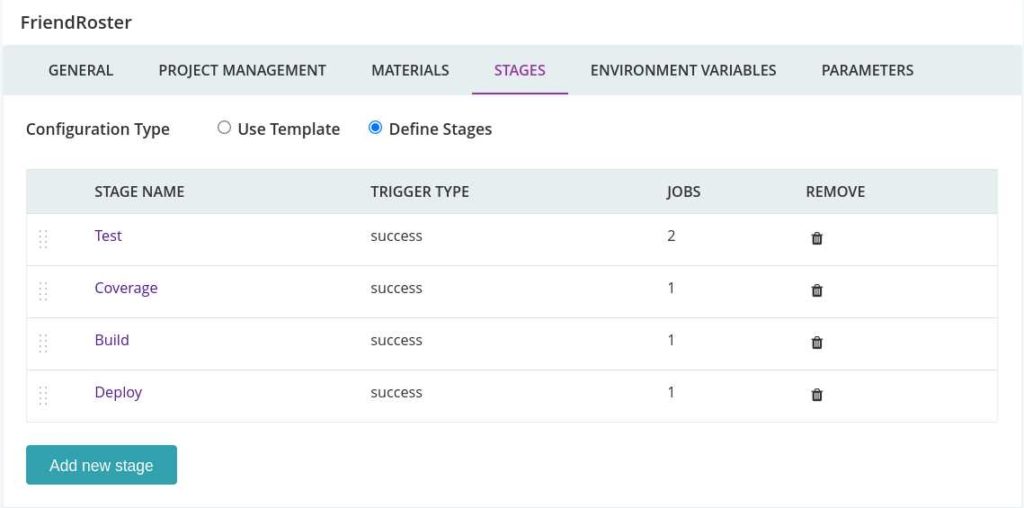
I've setup 4 stages. The first stage runs tests, second stage checks code coverage, third stage build the release version of the app and fourth stage deploys the app automatically to Firebase hosting. So every time I check in new code, it is ready to be tried out in production. Works fine for a one person team like me :).
Conclusion
That brings us to the conclusion of this series. Thank you for joining me in this journey. It is long but I hoping these posts will help me in future when I start a new project. Some other good resources can be found in the following video. Now on to my next fun project...