

Friends Roster – More Flutter Plugins
This is the continuation of “how I built the Friends Roster app” saga. If you missed the previous parts in this series, do check them out — part 1, part 2, part 3, part 4 and part 5. To recap I was using the following plugins in Flutter to reduce the amount of code I need to write.
firebase_core: ^0.5.3
firebase_auth: ^0.18.4
google_sign_in: ^4.5.6
url_launcher: ^5.7.10
cloud_firestore: ^0.14.4
timeago: ^2.0.29
clock: ^1.0.1
contacts_service: ^0.4.6
permission_handler: ^5.0.1
call_log: ^2.1.0
The ones in bold are covered in my previous post. Of the five screens I had in the app, I already covered two screens. The rest of the three screens are interesting.
Friends List Screen
In the friends list screen, I need to fetch the list of friends from Firebase Cloud Store. Before I go into further details, may be it will help to show the data model.
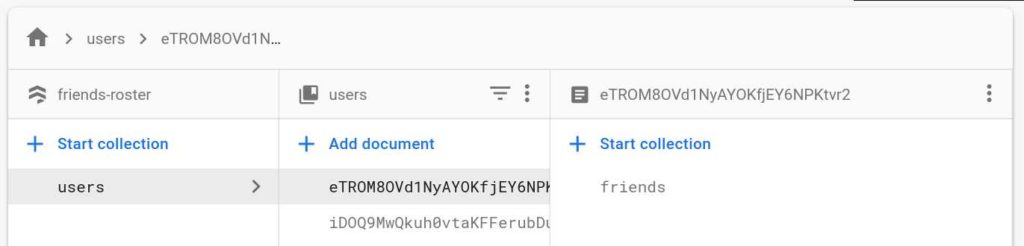
The top level collection is called users, so I can have multiple users login and be able to see their friends. For example I could be one user and my wife could be another. The users collection has a list of user ids. One for each user. Under each user there is a collection of friends.
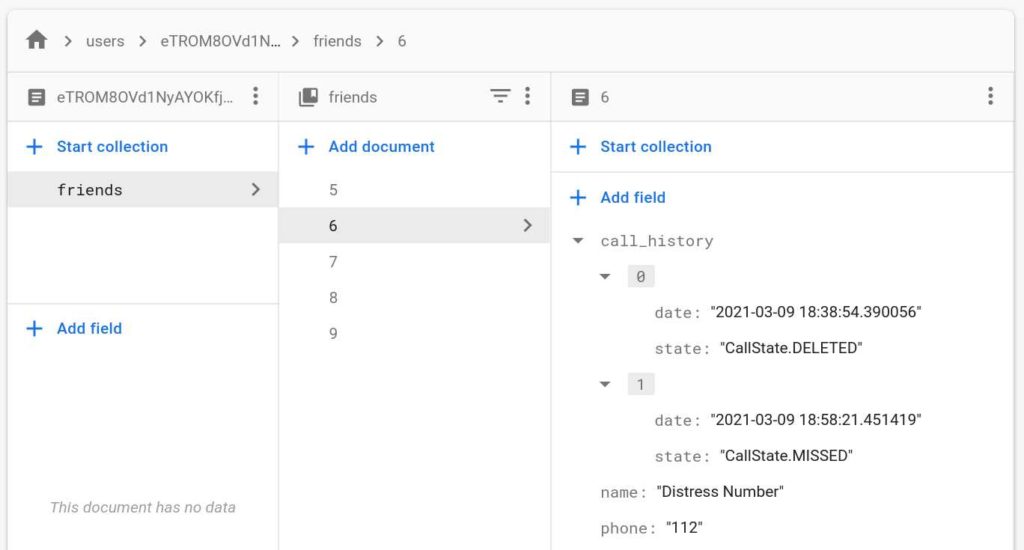
Each friend is stored in a JSON format with details about the name, phone number and call history. The call history is a list of records of all the calls to the friend. The date will tell you when you last interacted with the friend and the state will tell you what your interaction was -- which could be deleted, missed, skipped or called.
The friends list screen basically fetches this list and shows them on the UI. Flutter has the concept of streams which simplifies showing a long stream of changing items like the friends list.
Widget buildScreen(BuildContext context) {
  if (Dependency.auth.currentUser == null) {
    return buildLoading();
  }

  if (friendsStream == null) {
    try {
      friendsStream = Dependency.store
          .collection('users')
          .doc(Dependency.auth.currentUser.uid)
          .collection('friends')
          .orderBy('name')
          .snapshots();
    } catch (error) {
      return buildError(error);
    }
  }

  return StreamBuilder<QuerySnapshot>(
    stream: friendsStream,
    builder: (BuildContext context, AsyncSnapshot snapshot) {
      if (snapshot.hasError) {
        return buildError(snapshot.error);
      } else if (snapshot.connectionState == ConnectionState.waiting) {
        return buildLoading();
      } else if (snapshot.data.size == 0) {
        return buildEmptyList();
      } else {
        return buildContent(context, snapshot.data);
      }
    },
  );
}

Widget buildContent(BuildContext context, QuerySnapshot querySnapshot) {
  return Scrollbar(
    child: Material(
      color: Colors.white,
      child: ListView(
        padding: EdgeInsets.symmetric(vertical: 8),
        children: querySnapshot.docs
            .map((DocumentSnapshot friendSnap) =>
                FriendCard(Friend.fromSnapshot(friendSnap))
            .toList(),
      ),
    ),
  );
}
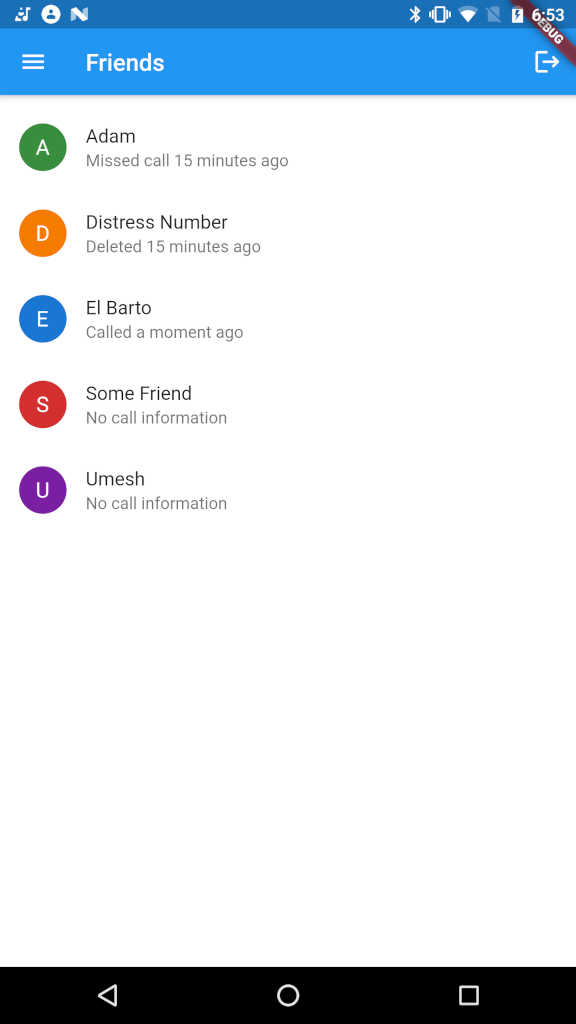
Did you notice the orderBy('name') highlighted in blue above. That sorts the friends list ordered by name. That is one more neat feature about Firestore. The indexes are built automatically for you based on your queries and I don't have to worry about sorting on the client side. You will also notice that I did not limit the number of friends because I don't have 1000's of records. But if this were to be a production app, you will want to add that too. Anyway, now the UI looks like this.
Friends Details Screen
When you tap on a friend in the list, you land on details page. The details page has a few more details like the full call history, phone number and buttons to make changes to the friends's call history. Since there isn't much to write about this screen, enjoy the screenshot.
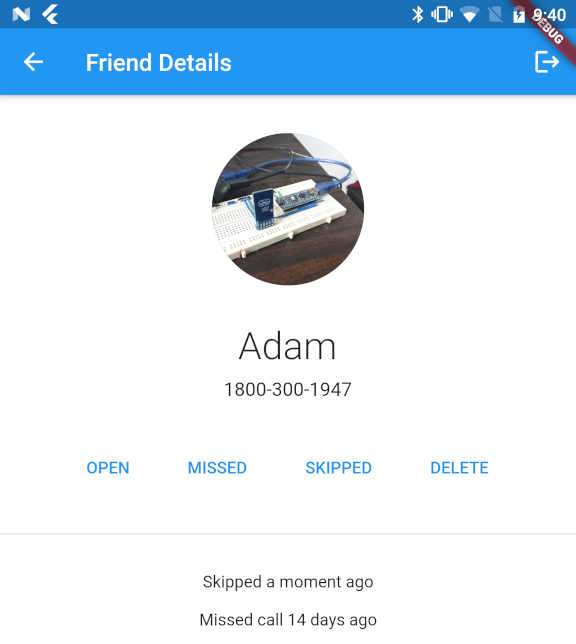
One thing I forgot to mention was that if the app is running on your phone, it will also pick up the avatar pictures from the device and display in both the list and details view. Again all thanks to the contacts_service plugin which loads up the contact avatar if one exists on the phone.
There is one more screen to cover, but that is where the meat of the app logic is. It will take a little more than a couple of paragraphs to explain. So will cover in the next post.