

Tools I Use To Repair Electronics
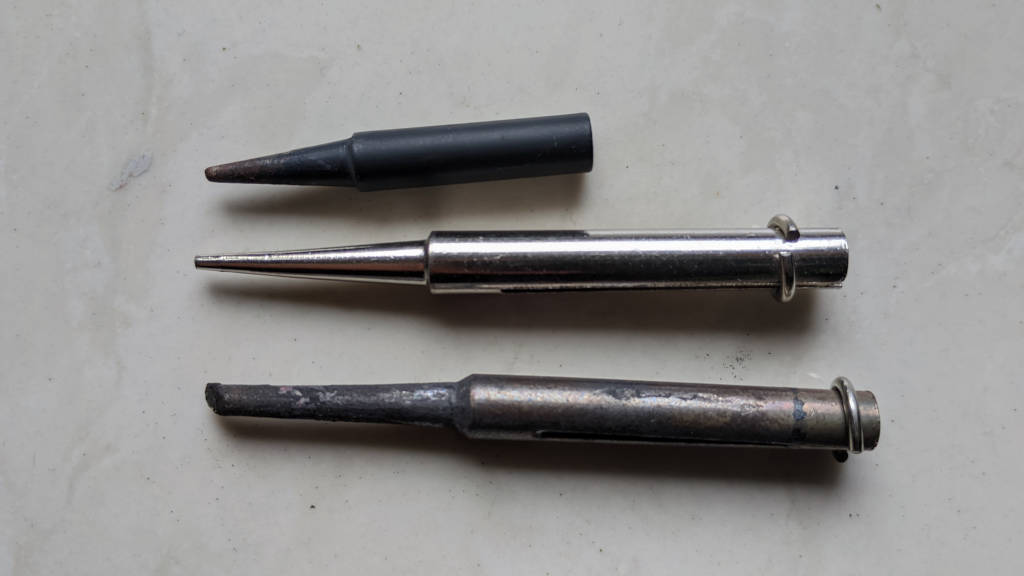
This is a continuation of my previous post on the tools that I have at my disposal when I am building electornic projects. As I mentioned before, this is not the comprehensive list of tools, but it should give you an idea. In the last post I left off at my soldering station. I use a couple of solder tips depending on the work. If I am soldering thick wires or soldering pins to an arduino nano board, I will use a chisel tip because it spreads heat well and makes good fat solder joint. For delicate work I use a thinner conical tip. Other than that I don’t use any other tips.
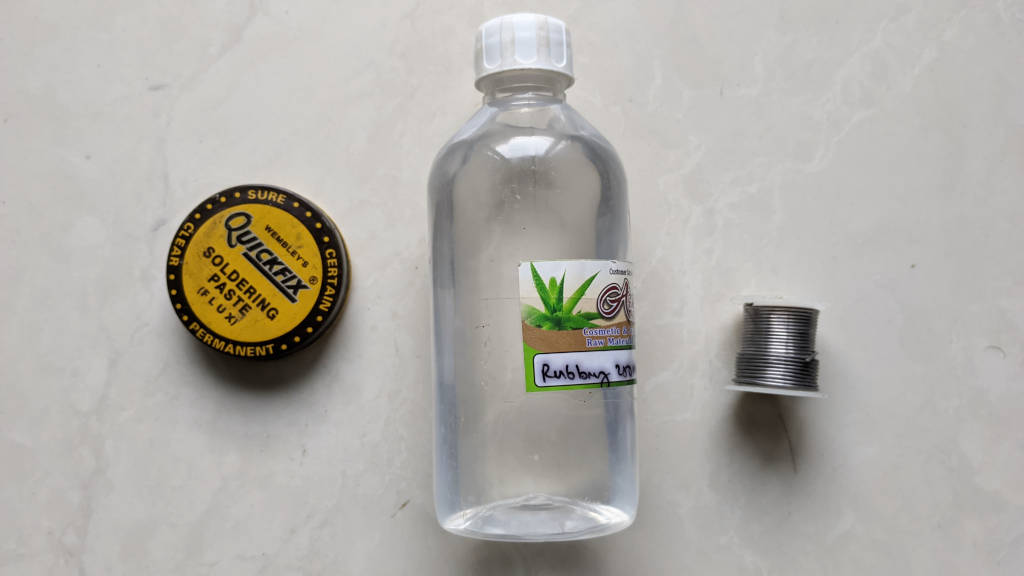
Not only do you need a good soldering iron, but you also need the things that go along with it. These are solder, flux and rubbing alcohol (aka isopropyl alcohol). I prefer to use lead solder because lead free solder is hard to work with. But remember that lead is dangerous because of the risk of lead poisoning. Please wash you hands properly after handling lead based solder. Flux is used to clean the surfaces on which you are doing the solder joint. It helps facilitate a good joint because it removes oxides. Finally, I use rubbing alcohol to clean the solder joints of all the residue. I take a cotton ear bud, dip it in rubbing alcohol and swipe the solder joint and around it. It will make the PCB look clean.
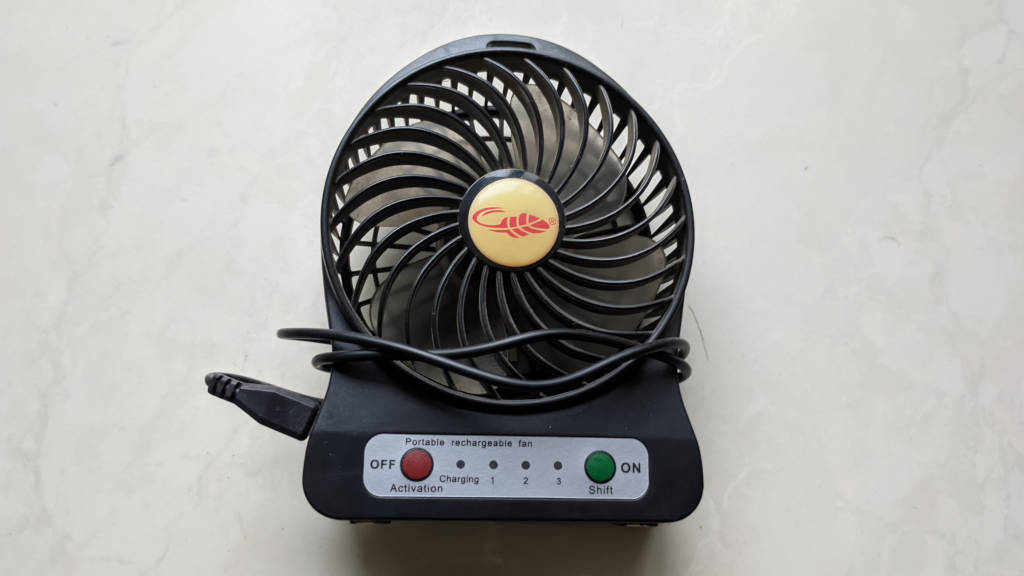
Also if you are soldering in enclosed space, or even otherwise, use a small fan to blow away the fumes so you won’t inhale them. Don’t use a fan that blows air quickly otherwise your soldering iron will cool down. Find a low speed fan like the one below that I use.
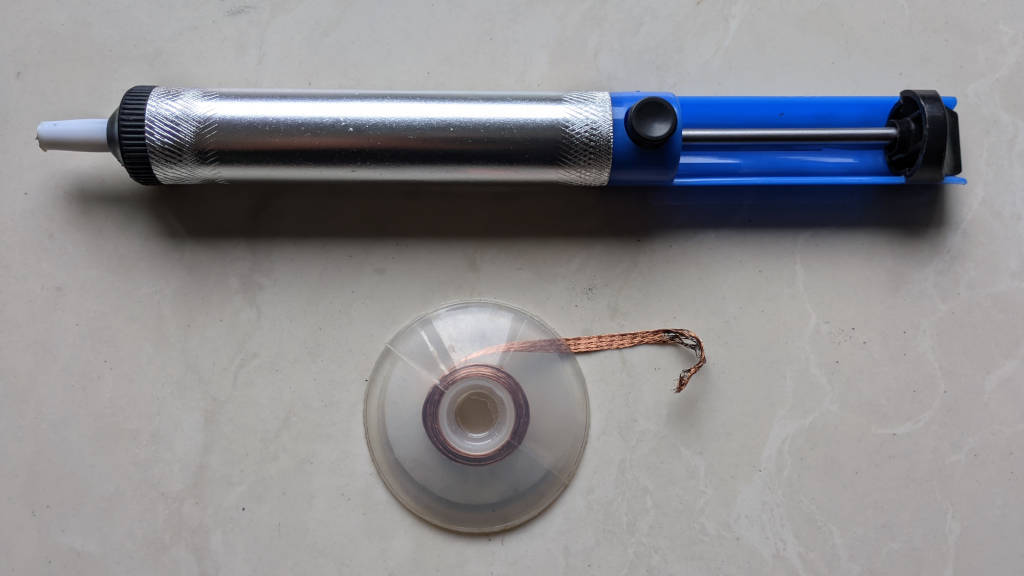
If I make a mistake in soldering, or if I am repairing something (TV, phone etc) where I need to pull out components from the PCB, I use a desoldering wick. But recently when I was fixing my TV, I decided to buy a desoldering pump to speed up things. It is a very worthy investment. For the cost, it gets the job done quickly. You can also try an electric pump too which again is quite cheap for what it does. If your livlihood depends on repairing electronics you could invest in an expensive one.
A tool I wish I could try is a one handed soldering iron but I am not sure how good it is. I have seen a few youtubers use it. Next, I have a bunch of heat shrink tubes to cover any exposed wires where I don’t like using electric tape.

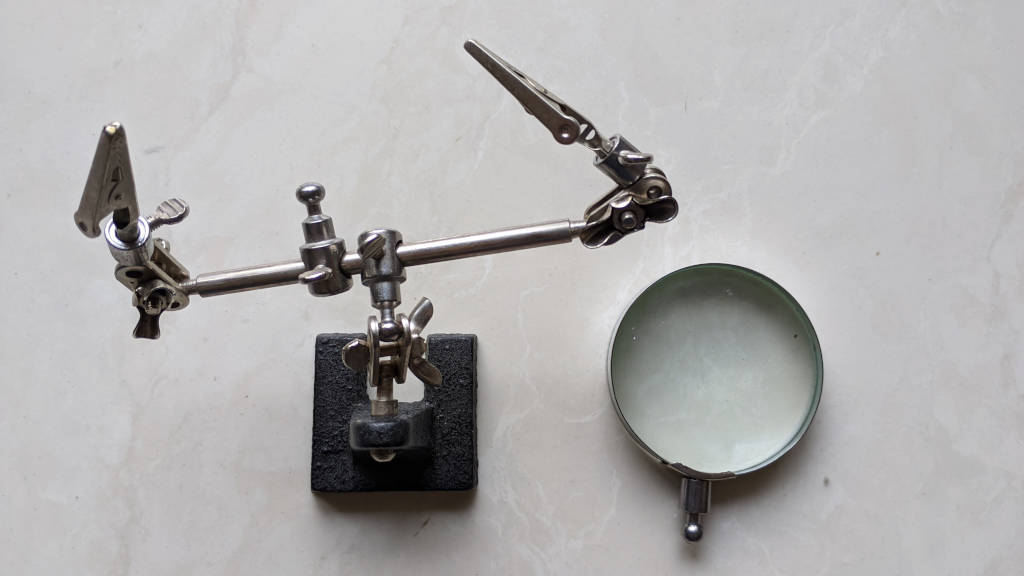
I also have a solder helping hand (aka third hand), but I rarely use it. The problem is that it keeps toppling over when I try and hold a heavy PCB in the helping hands. I use my phone instead of the magnifying glass that came with it. Perhaps if I purchased a more expensive one it might have been useful. This is one of those times when you better not cheap out.
A tool that I might invest in the future is a conformal coating spray. The reason is that some of my electronics that monitors my solar panel power, grid and load is situated outside my house. While I have placed electronics in a sealed box with Silica gel to absorb the moisture, the exposed metal surfaces are corroding. If I can spray the conformal coating it will protect the surface. Anyway, I can keep on talking about soldering for ever. Instead, if you are interested in watching a video, try the one below.
Next you need some good tools to be able to open devices. The basic tool you need in this case is a screwdriver with lots of bits. Here too, you don’t want to buy something cheap. Look for a good quality one. Unfortunately while I did not want to cheap out, I could not find good quality ones. Initially when I wanted to upgrade my HP Envy 15t laptop’s RAM, I needed a Torx T4 screwdriver which I did not have at the time. Since I was in a hurry, I got one from a local shop. The bit worked for just one time to unscrew and screw all the 10 or so screws in the laptop. After that, the bit edges started chipping off. Later when I needed to open the laptop again to replace the battery, the bit would not work. Then I ordered a good quality screwdriver set from Amazon. The bits were good, but the screwdriver itself was very slippery. So you could not use a lot of torque on it as it slips out of fingers.
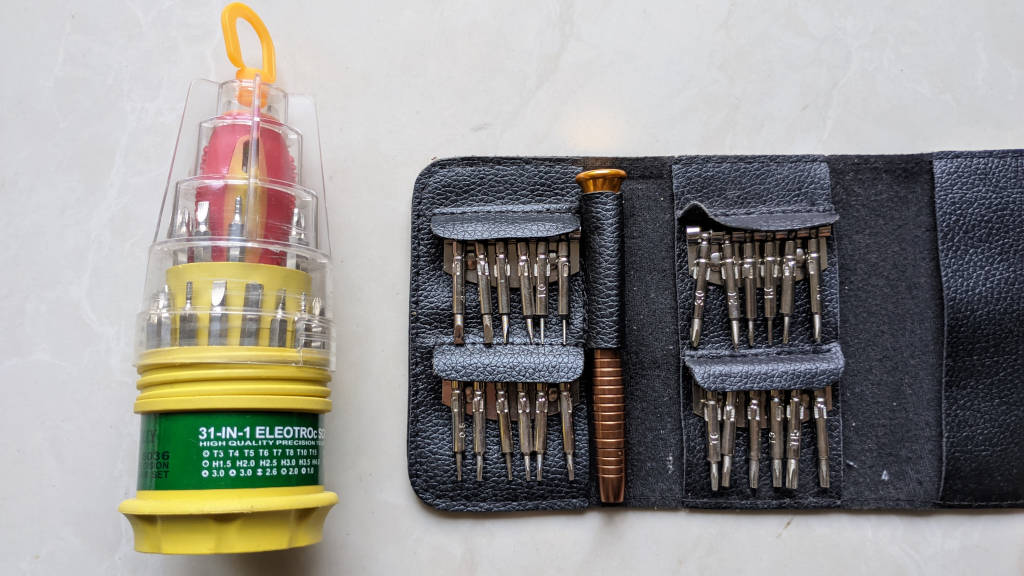
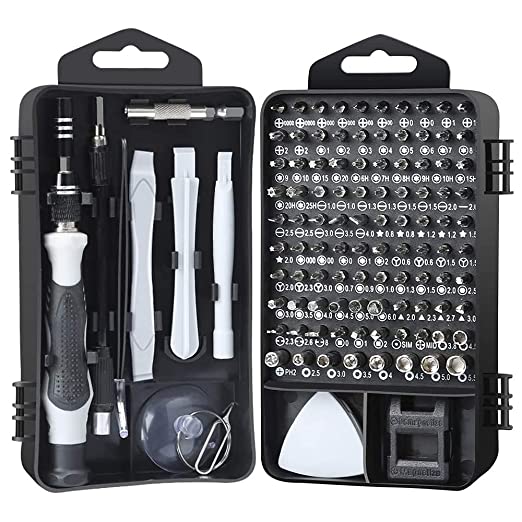
Even with the new screwdriver set, I find it very lacking when opening some devices. When opening laptops, or phone or tablets, I always used a guitar pick to pry open the device case after removing the screws, but it was not very effective. Especially since the pick would bend too much when sliding in the gaps. So eventually I purchased a new screwdriver set with all the bells and whistles. I had always wanted multiple pry tools which this set has including triangle plectrum and spudgers. More importantly it has a suction cup which I found the need multiple times during my repairs. There is also a flexible extension for the screwdriver to reach awkward places, which I would like to give it a try. I felt the need for it when I was fixing the brakes of a bicycle once. More importantly the screwdriver has a good grip.
Having said all that, I am still not sure about the quality of the bits. It worked fine for a couple of repairs I have done lately, but not sure about long term performance. I really wanted to purchase an expensive set, but could not find the one I wanted in India. You see, I am looking for a screwdriver set with bits made out of S2 steel alloy instead of CrV (Chrome Vanadium) steel. Although CrV is still good I prefer S2. Even with screwdrivers (including mine) which are advertised as made out of CrV steel, I really doubt the credibility. How is possible for them to be so cheap otherwise? The set that I really wanted to buy was the iFixit kit. But it costs Rs. 15,000 in India! In the US it is selling for $75 which translates to about Rs. 7000 even if you include taxes and high currency exchange rate. So if you have someone in the US, get that one :).
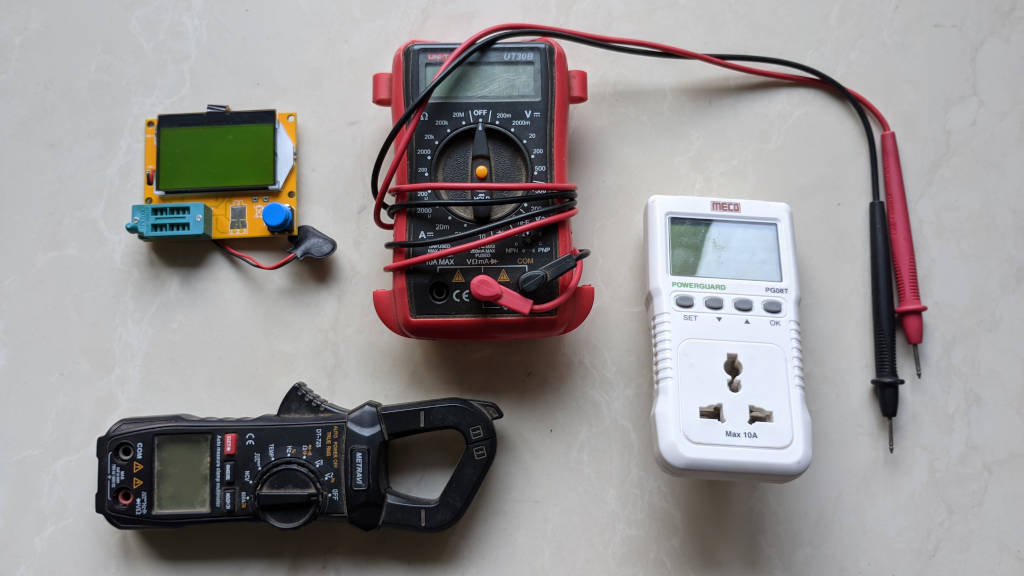
Finally, I have a few measuring tools. First is of course a multimeter to make all kinds of measurements including AC/DC voltage and current, resistance, continuity tester, diode tester and hFE measurement for transistors. Multimeters have come a long way and even the cheaper onces are quite accurate. The multimeter I routinely use is not auto ranging which is how I like it because it is faster. But you could go for an auto ranging one if it simplifies things for you. I have been using multimeters since my engineering days, some 20 years ago. However, when I started my solar panel project a couple of years ago, I found the limitations of my multimeter. I really needed to measure currents over and above the 10 A limited range of the multimeter. Moreover I did not want to split wires to measure current (remember current is measured in series).
At this point I decided to invest in a good clamp meter. Most of the clamp meters that I could find only measure AC current, but this one could measure DC current as well which is what I wanted. If you want the best in class clamp meter, I’d suggest a fluke meter if you can find an original.
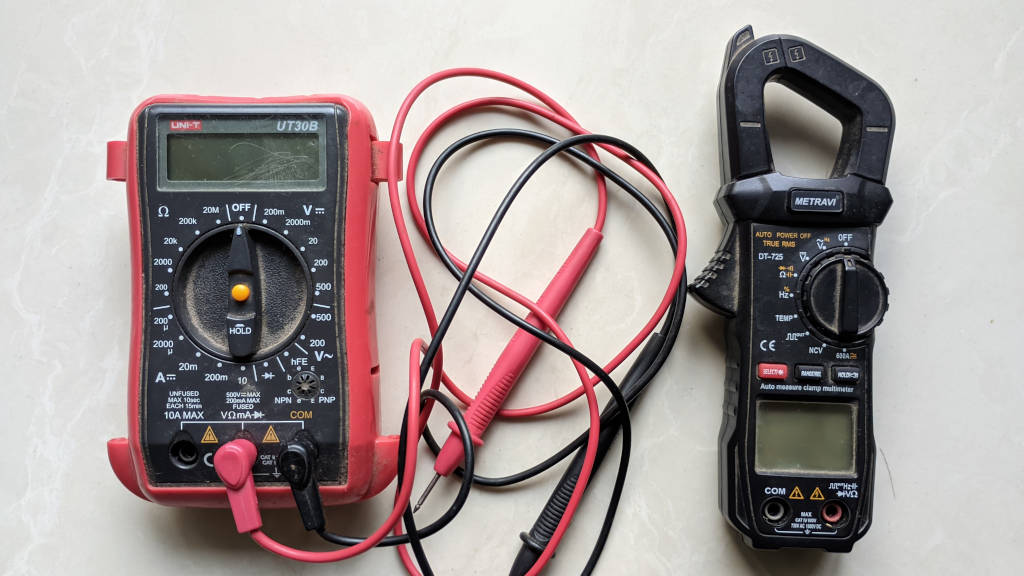
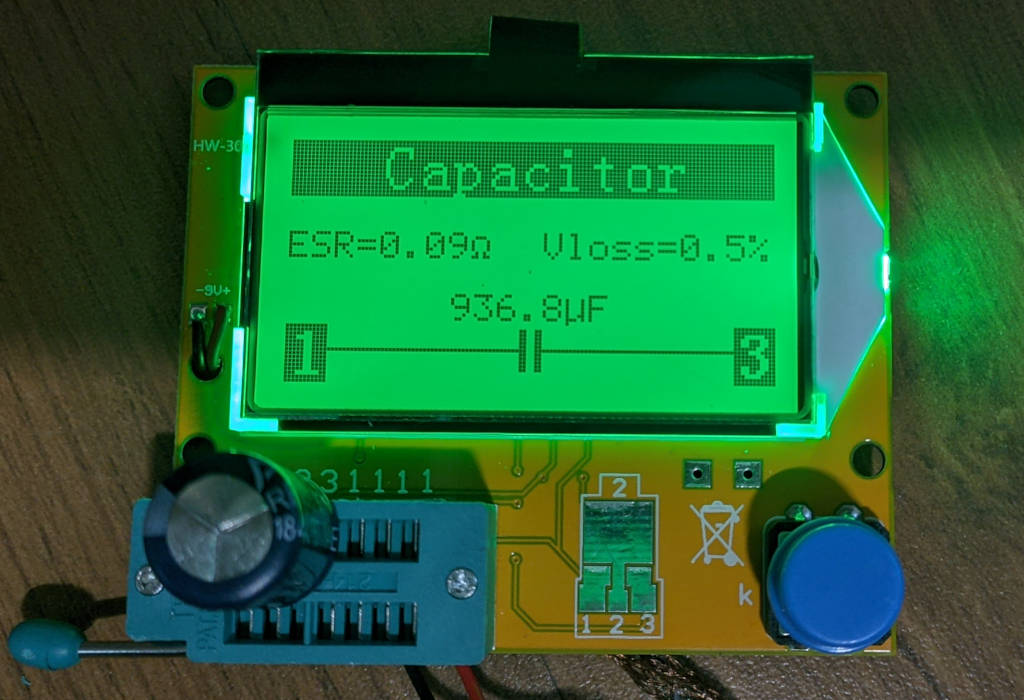
As a side effect, the clamp meter I purchased also functions as a auto ranging multimeter, for when I need it :). Another useful feature of the meter is that it can measure capacitors which I did not have earlier. This came in handy later when I needed to repair my TV and I had to replace bad capacitors. However, it would not display the ESR or leakage of the capacitor. Since some of the capacitors from my TV were reading correct capacity, I was left wondering if there was a problem with leakage or high ESR values. So I purchased a LCR meter too. Again, one may not need all these tools. It depends on what you are doing.
I also purchased an energy meter a while ago when I wanted to know why my electricity bill was going up. It can measure energy usage of any appliance up to 10 A. I had a lot of fun measuring the energy used by TV, fridge, surround sound system, computers, mixer grinder, etc. But in retrospect, I wish I purchased something that can handle up to 20 A (which were hard to find) because that I can measure the energy usage of microwave oven, washing machine etc.
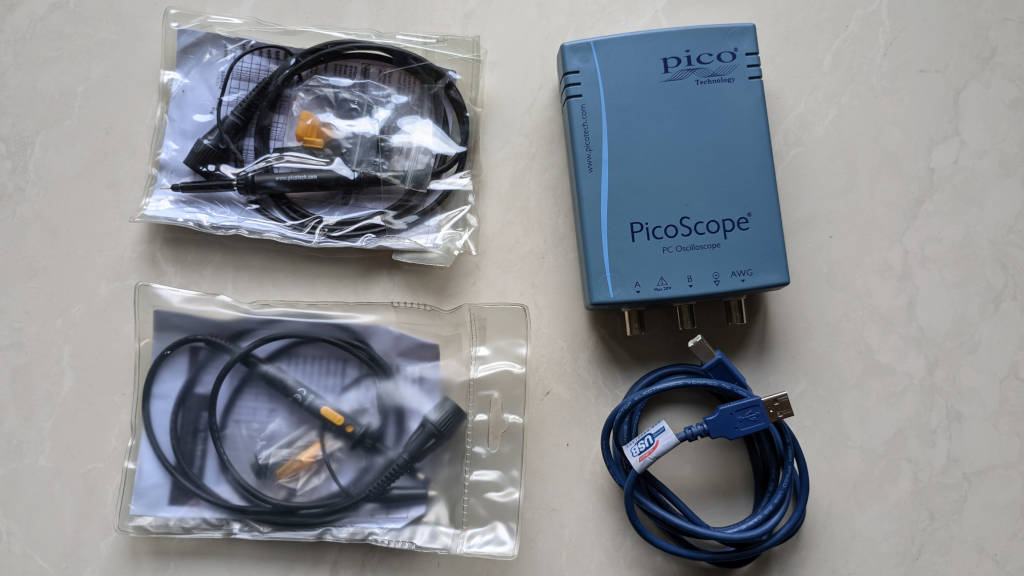
One final measuring device is an oscilloscope. I wanted a compact scope that could interface with my laptop so I can take screenshots and store the data. So I got the PicoScope 2205 from someone who was traveling from the UK. If I were to buy one now, there are better options available. It has FFT spectrum analyzer, arbitrary waveform generator (AWG) and a function generator. I bought it a long time ago in 2012. An oscilloscope is an indispensible device for any electronics enthusiast.
That is pretty much all I wanted to cover in this post. Sorry that this post became so long. To bring back sanity to readers who are not interested in this kind of stuff, I will give a break and write about other stuff in the blog. Then I will continue on with tools I use to repair mechanical things like cycle.