

Tools I Use In Electronics Projects
A reader asked to me to write a post on the tools I use in my projects. Since my projects range from software to electronics to mechanical, the number of tools I use becomes quite large. So in this post I will cover the tools I routinely use in electronic projects. May be in another post I might cover the tools I use for more mechanical projects such as repairing cycles or scooter, setting up solar panels and batteries, building rain water harvesting pipes, plumbing, drip irrigation etc. If anyone is interested, I might also write a post on the tools I use in software development but in this case the tools vary quite a bit depending on the software. Anyway, lets get straight to the point and do a bit of show and tell of the tools I use in my electronic projects.
I love tools because to get the job done right and fast, you need the right tools. Unfortunately I cannot buy all the tools that I would like to because of cost constraints. Moreover, some tools are for special purpose and you will probably need them very occasionally. Take for example a CNC machine, or a 3D printer. I would rarely use them, but when the need comes, they do a quick and nice job. Anyway, lets get back to the tools that I own. Before I start explaining what I have, remember that these are not the comprehensive set of tools that one should have. These are some of the tools that I own. Also, some of them which I consider as tools may not really be tools for you. With that out of the way, lets get started. There may be some sections which you may not understand, so feel free to skip them.
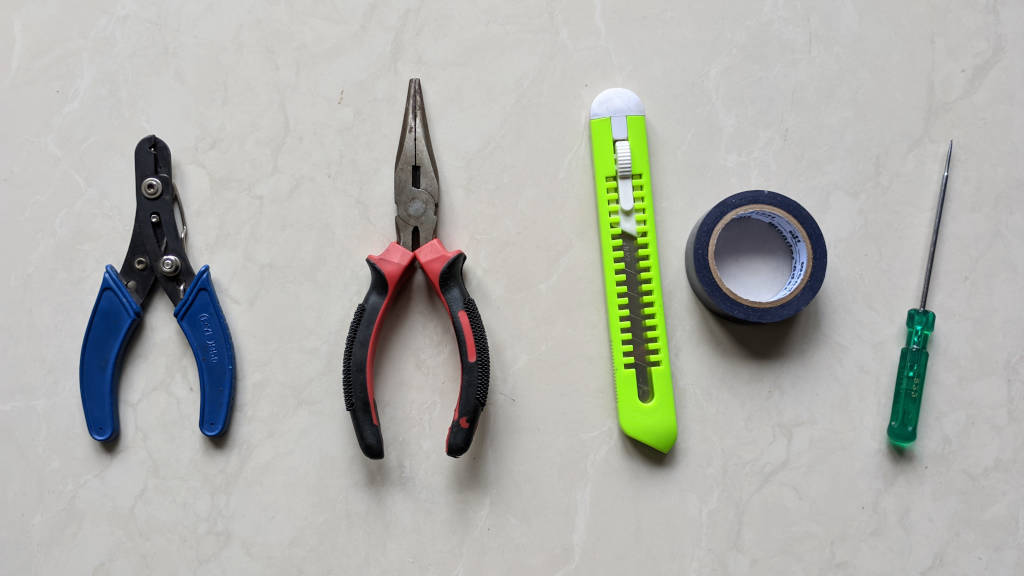
I will try and introduce the tools in the same order that I would use when I am building an electronics device for one of my projects (say home automation or solar panel controller). In another post I will show you the tools that I use for repairs (like fixing TV, laptop, phone etc). The very basic tools that I use when I get started on a project are a bunch of screwdrivers, electric tape, wire cutter and pliers.
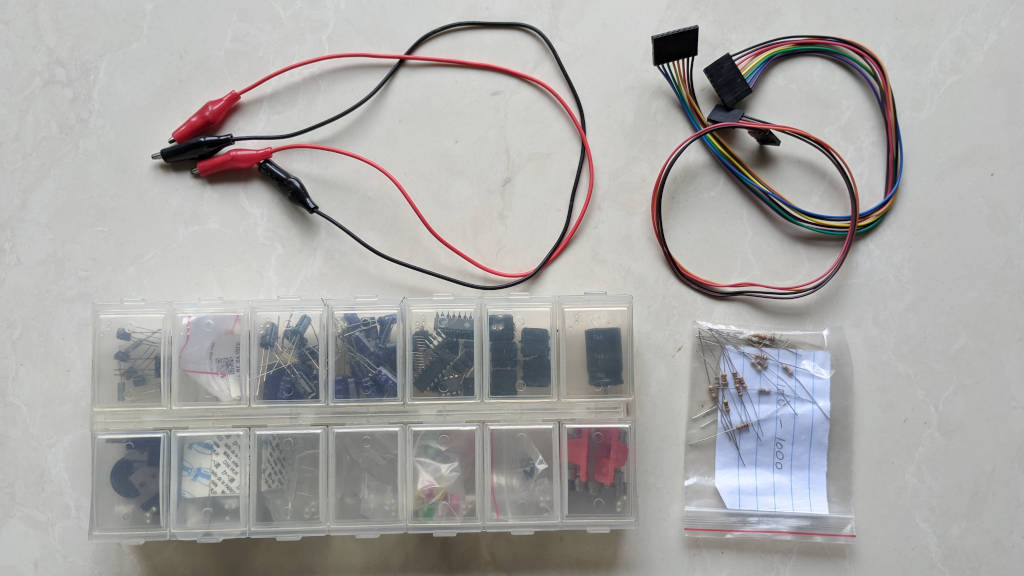
Next I use a breadboard to build my design. A bunch of male-to-male, male-to-female and female-to-female jumper cables help in prototyping the design quickly.

I have a box full of small parts organized by type of device. These could be resistors, capacitors, transistors, fuses, sensors and the like. I also have some headers with multiple pins so it is easy to connect to arduino boards. You will also notice double ended alligator clips with insulation covers in the image below. Those are quite useful to connect a multimeter without touching nearby pins.
When I am building minor projects that don’t need a lot of processing power my usual choice of devices are Arduino Uno, ESP8266 and Arduino Nano. Usually I use the Nano, but in rare cases when I don’t want to put things on a bread board I go with Uno with jumper cables. When I need the device to be connected to wifi I use ESP8266. I try and avoid using it because it is a 3.3V device and most components I use run on 5V. I will need a level shifter for those occasions. I also use HC05 for when I need bluetooth connectivity.
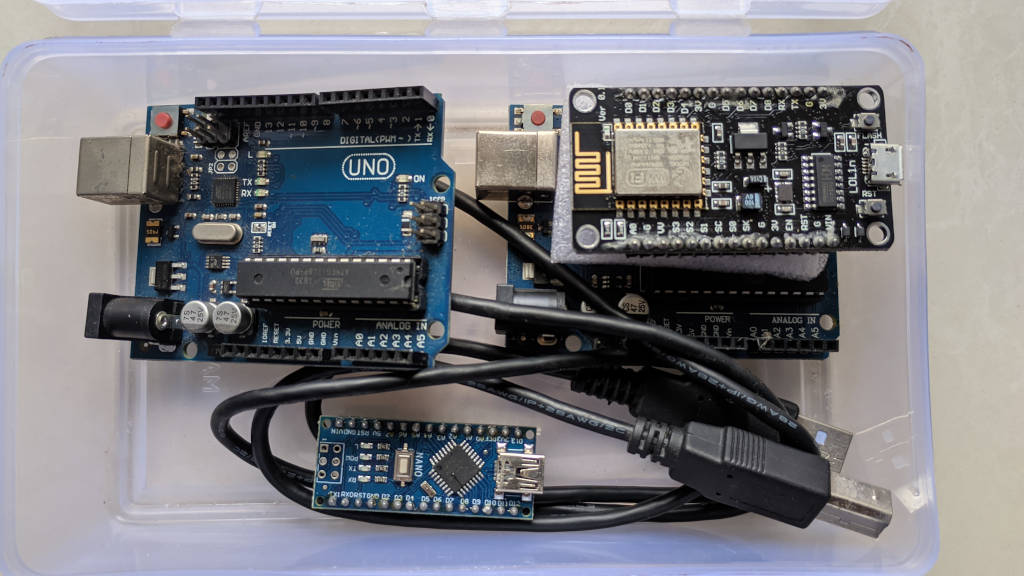
For the times when I need more processing power or if the project requires complex code, I go with Raspberry Pi.

Once the prototyping on breadboard is done, I move the components on to a PCB prototyping board. I have few different sizes lying around depending on the size of the project.
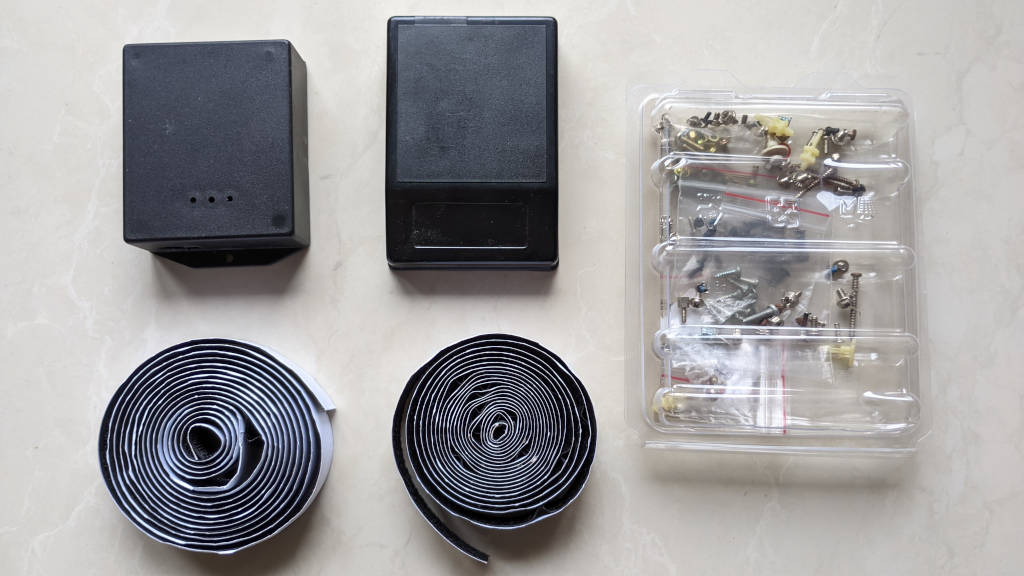
Finally when the board is built, I place them inside plastic enclosures like the ones below. I have a bunch of different sizes and color boxes to match the project. Once the board is inside the enclosure, I prefer to not use screws to fasten them to the walls. Instead I use velcro on the wall and the enclosure so I can stick the box to the wall. When I need to make changes, I can pull out the box (velcro remember?) from the wall. If I screw the enclosure into the wall, I lose this flexibility. So I have a bunch of screws and velcro.
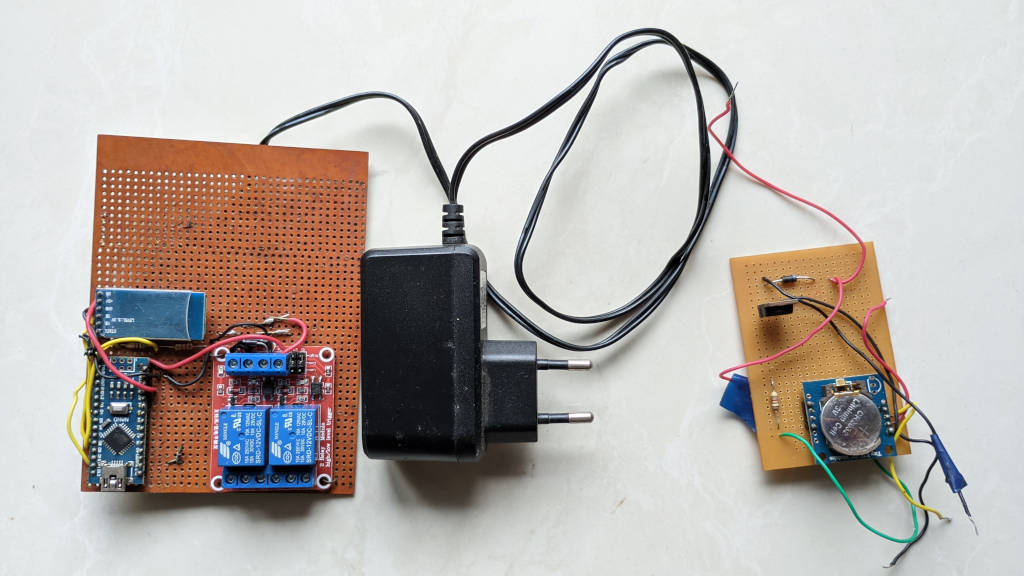
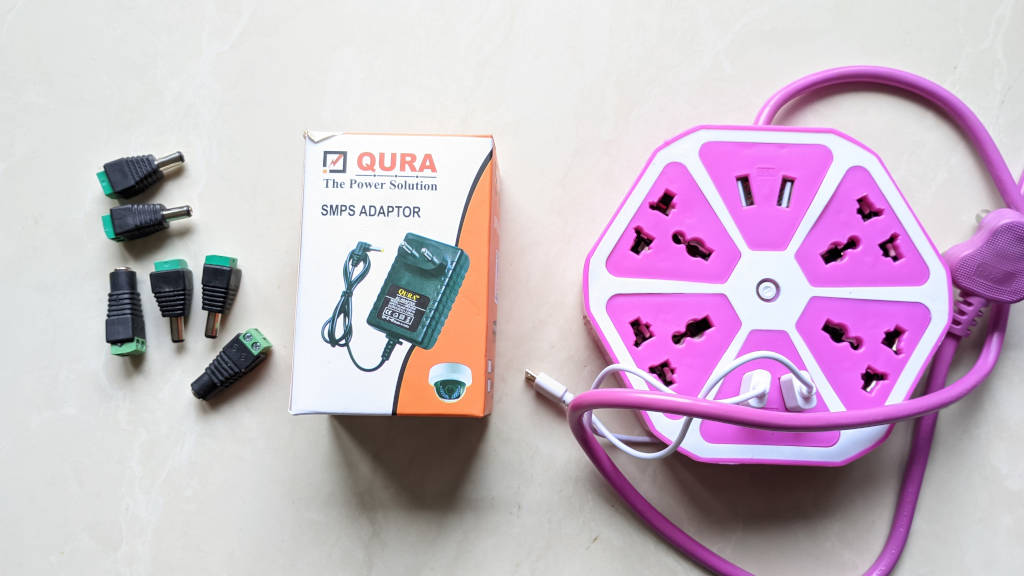
Since every device needs power, I have a bunch of 3.3V, 5V, 7.5V, 9V and 12V DC power adapters. If you buy adapters, consider also buying a bunch of DC power jacks with 2 pin screw terminals as well so it will be easy to connect jumper wires from DC adapter to your electronics. One thing I really miss is a bench power. If you have the money for it and are serious about electronic projects, I strongly suggest that you invest in a decent bench power supply. What you see below is a poor man’s version of power supply.
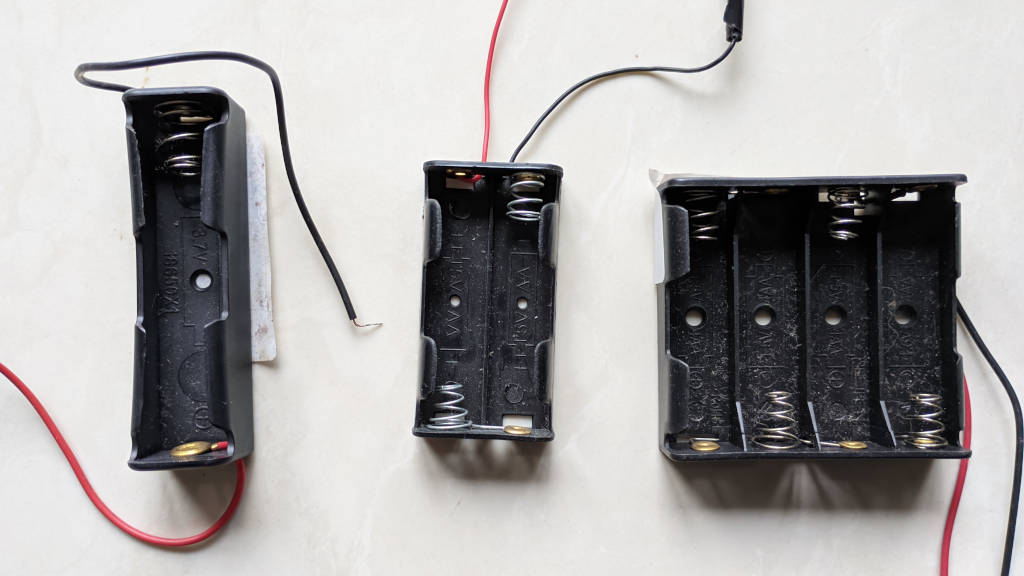
If a project requires battery power, I have a bunch of battery compartments ranging from single Li-Ion cell to 4 cell compartments.
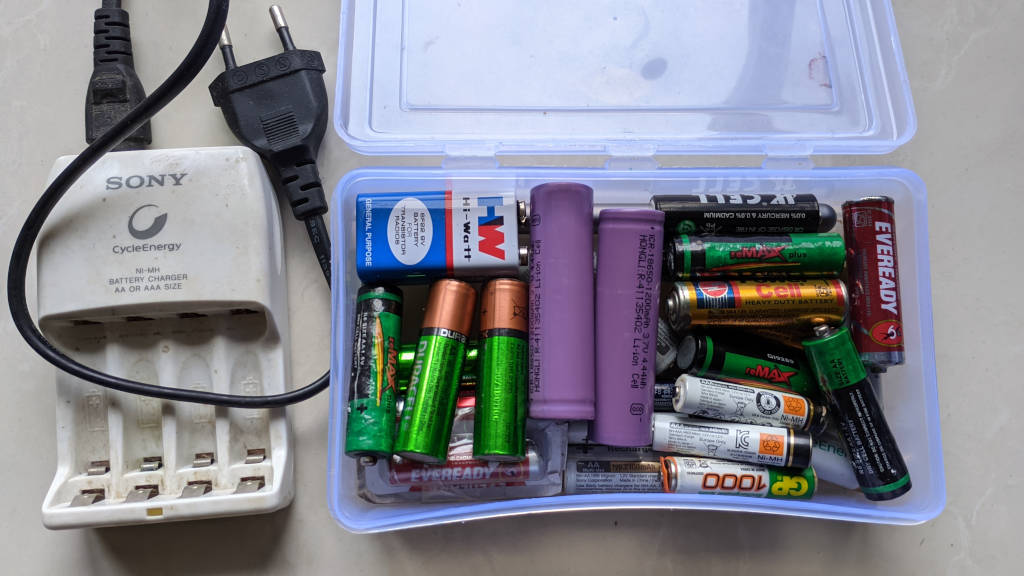
Of course you also need a bunch of batteries and a battery charger to go along with it :).
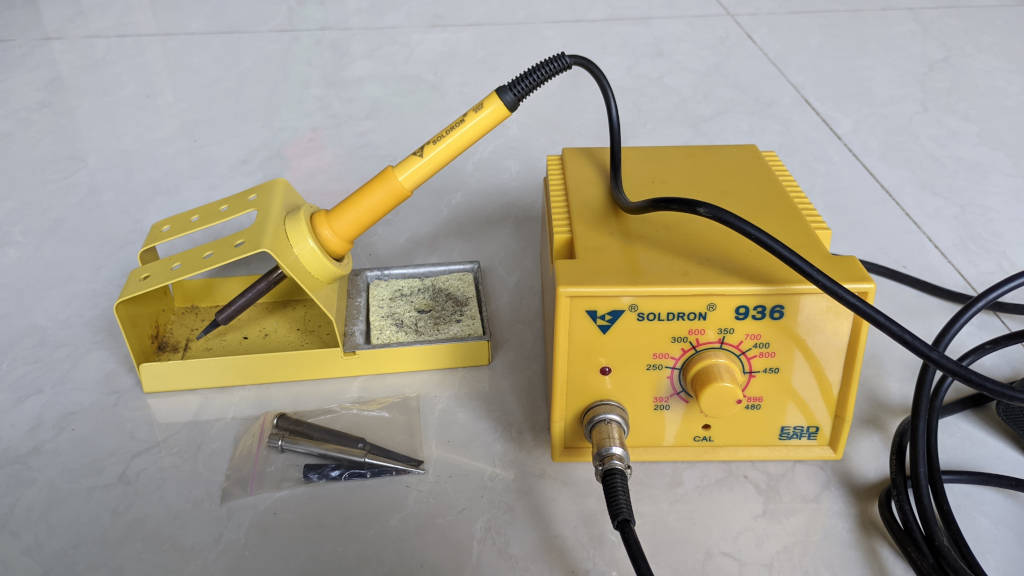
Finally you also need a soldering iron, solder and flux to do all the soldering work. I use a slightly expensive soldering station. You can probably do away with a simple soldering iron. However, if you go with a soldering iron, don’t go with anything less than 50W. Otherwise you will be sitting for a while waiting for it to get hot and moreover the solder joints will not be good if the iron cools down too quickly when soldering cold components or in a cold weather.
Since this post is already too long, I will introduce the rest of the tools in my next post.