

DIY Newton's Cradle
It has been a while since I wrote anything about the projects I do with my daughter. Actually we haven’t built anything in a long time. I was doing some small cardboard projects but nothing to write home about. However, recently we built a newton’s cradle just for fun and I thought it might be an interesting project to blog about. I think my daughter came across Newton’s cradle somehow in one of her videos and she was explaining to me about this toy where balls would swing like a pendulum. I immediately understood what she was trying to explain and decided to built it.

Whenever my kid finds some toy interesting, I would normally just buy the damn thing and be done with it. But this time some common sense prevailed, perhaps because my minimalist instincts kicked in, after having practiced it for too long. We did not want more things in my house. Well we could make her donate some old toys and buy this one, but I got an even better idea. I asked her how she would feel if I built one with the things she already has instead of buying the toy. She was quite excited and that is all the ammunition I needed.
I had a fairly good idea of the ingredients that go into the toy. I also know she had all those things. For example I imagined we need some heavy rigid balls, which could be marbles which she has a ton. Then we probably need some thin strings and some stand. The stand I thought I will build with some sticks and cardboard. I had no idea how, but I was hoping there will be some simple process.
While I have the ingredients, I did not have the recipe. Since I did not have the smarts to figure out how to build it on my own, I searched for some DIY Newton’s cradles on Youtube and found some good ones. I won’t bore you with too many details about how we built it because I pretty much followed a combination of couple of videos.
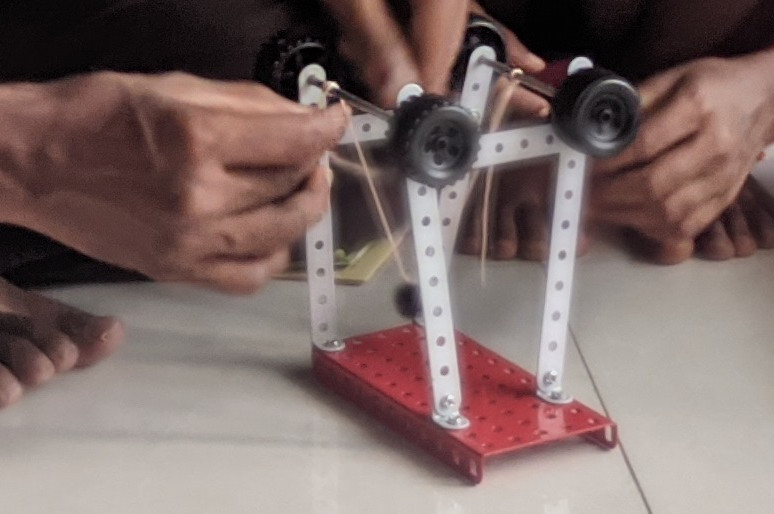
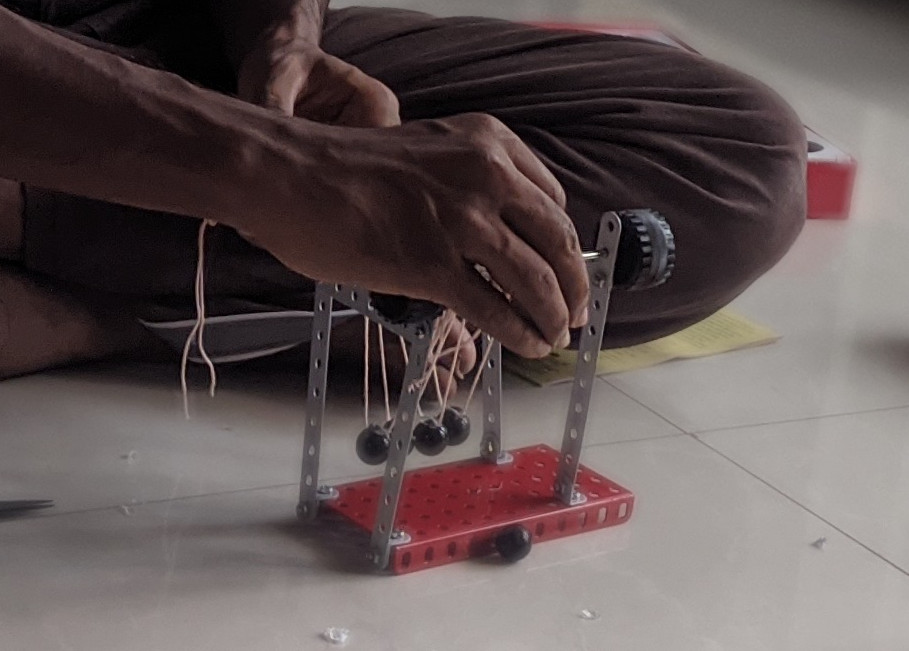
Basically we hot glued 5 strings to 5 marbles and attached them to a frame that we built using some mechanix’s parts. She already had marbles and two mechanix sets, one which we purchased and another she got from donation. So it was all about doing the work. It took a lot of time for us to get the alignment right so as to make all the marbles be in line in all 3 dimensions. The other problem is that the string did not have enough surface area to keep it attached to the marble. That took some time too. Anyway here are some pictures (the quality is not good though) that tell the story.
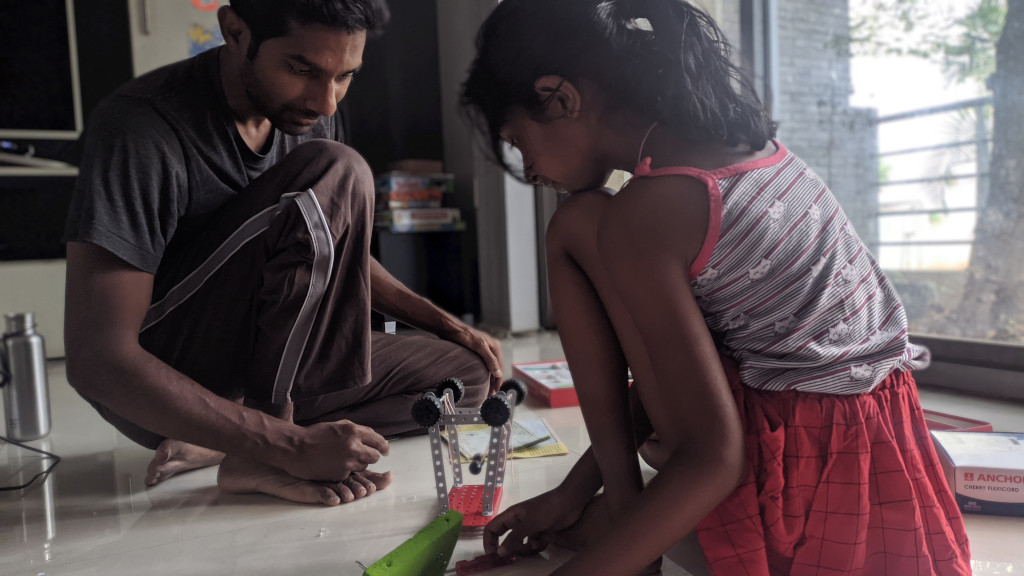
My daughter had a lot of fun playing with it while it lasted, which wasn’t very long really :). It probably worked for 2 days and the marbles started falling off the strings because the hot glue couldn’t stick very well to the smooth marble surface. Next we tried super glue, but had the same problem. At this point we gave up and decided the project is a wrap!