Mechanical Keyboard Repair
A few days ago, my mechanical keyboard started to develop some weird issues. If you remember, this is my first mechanical keyboard which I bought in November, 2021. The purchase date has a significance because in almost exactly 3 years, in November 2024, the keyboard started to misbehave. I know it is a coincidence, but sometimes I wonder if it is part of the planned obsolescence theory. Manufacturers design the hardware in such a way that the products automatically fail after a certain period.
Anyway, the problem I was facing was that when I press certain keys, some other key is also getting registered in addition to the one I typed. For example, if I press the “/” key on the numpad, I get a “/”, but immediately after that I also get a number “2”. Similarly, when I type “8” on numpad, I also get a “w” along with it. Same happens with “5” (on numpad) also registering “a” and “2” (on numpad) registering a “z”. It was super weird. The problem happens the other way around too. When I type “z”, I also get a “2” or “down arrow” keycode if numlock is off. This was very frustrating and I could not use the keyboard anymore. Every time I was typing where any of the above keys were involved, I would get random letters in between.
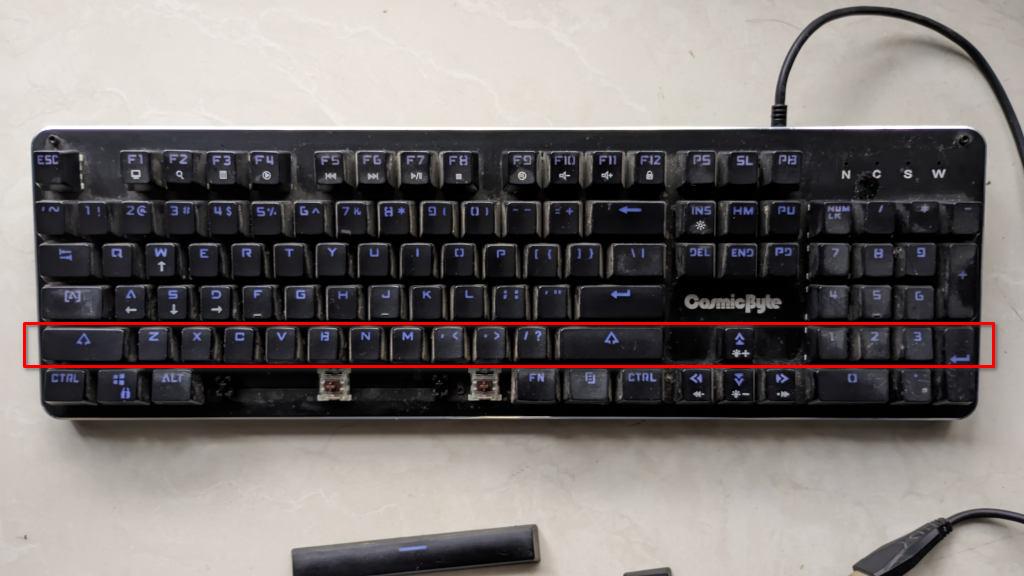
If you look at the keyboard layout (see picture below), you might find something interesting. It seems like there are 2 columns (marked in red) of keys which are interacting with each other in some fashion.
Another thing you might notice from the picture above, is how dirty the keyboard looks. I thought may be some dust or liquid entered the keys and somehow shorting them. Although I was not very confident of that theory since the two columns of keys are so far apart. Still, I decided to open the keyboard and give a good cleaning with my vacuum cleaner.
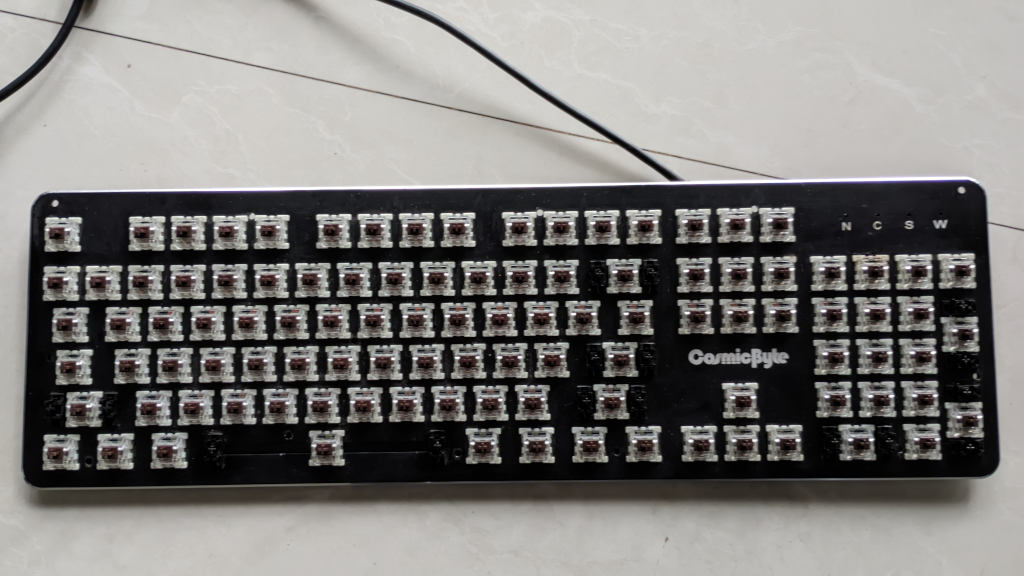
First order of business was to remove every single one of those 104 keys. The keyboard comes with a key plucking tool, but I used my fingers to remove the keys since it was faster that way.

Once the keys were removed, you can see the brown switches. I opted for brown switches since they were more silent than blue switches and yet were still tactile unlike the red ones.
After removing a bunch of screws, I was able to remove the backside of the keyboard which exposed the PCB (printed circuit board).
The PCB seemed clean and I could not see any dust or liquid in there. Still, I vacuum cleaned it and cleaned every single key. Put the keyboard back together and plugged in to my laptop. Lo and behold! No, nothing like that happened really. The keyboard behaved exactly as it did before.
Ok, time to open everything and do more aggressive cleaning. This time I used isopropyl alcohol and a brush to clean the whole PCB. Dried it up properly with hot air from the other side of the vacuum cleaner. Put everything back the way it was and plugged it in. Still no luck :(.
My daughter was watching me struggle with the keyboard and she started to play with the light effects of the keyboard which she likes. In doing so, when she changed the light effects, we noticed something very interesting. When the keyboard backlight is set to zero, there is one row of lights which were still glowing faintly. Unfortunately I did not take a picture of it, but I marked the row in the picture below.
There is one more peculiarity about the whole issue. In that row, the light under the keys “z” and “2” on the numpad were glowing more faintly that the others. First of all, none of the lights should be glowing when the backlight of the keyboard is set to the lowest. Yet, that row of keys were still glowing. Moreover a couple of keys were glowing a little less brightly. Hmm, that does not sound right. I had a hunch that there is something wrong with those LEDs (light emitting diodes) under those 2 keys which are somehow causing the whole row of lights to glow when they should not.
Time to open the keyboard one more time. Now this is getting more tedious and frustrating because it takes a long time to remove each and every individual key and I am stupid enough to put back everything before testing.
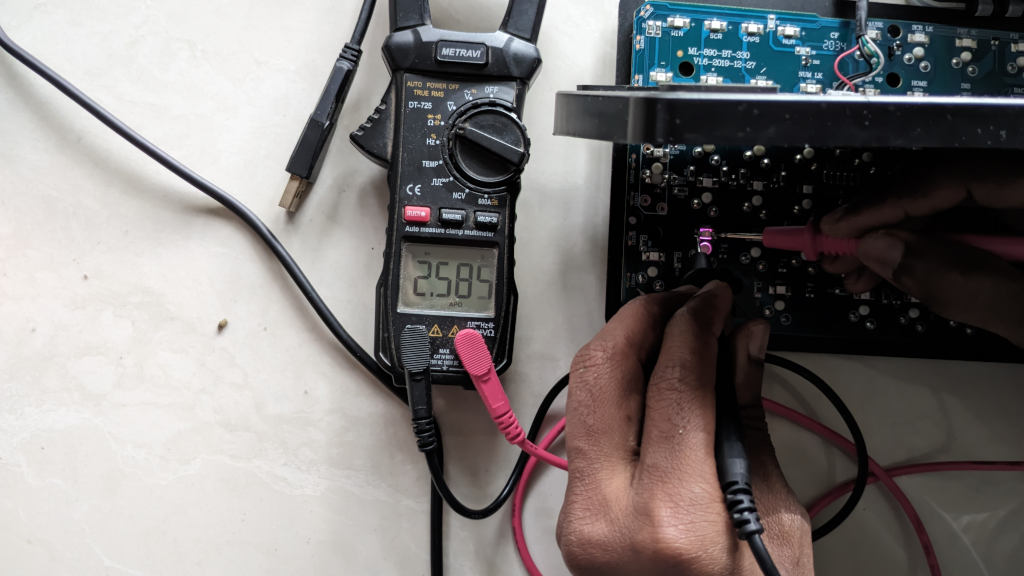
Once the PCB is exposed, I randomly checked a few LEDs using my multimeter (set to diode mode) and the forward voltage drop readings were inline with what you would expect from a properly working LEDs. For example, for a purple LED which is in the same row as the problem causing keys, the forward voltage drop was 2.5V and the LED was glowing when testing with the multimeter.
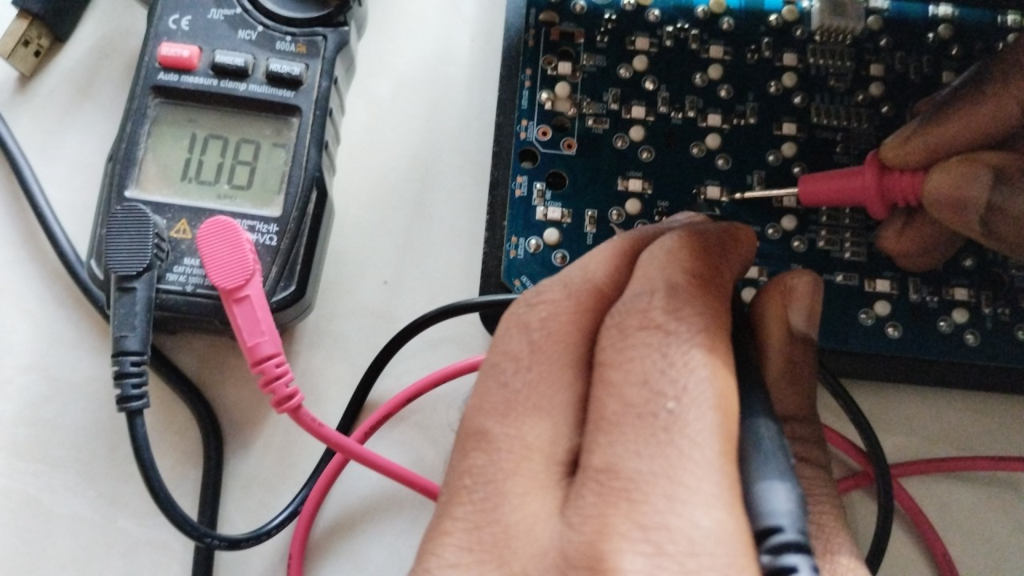
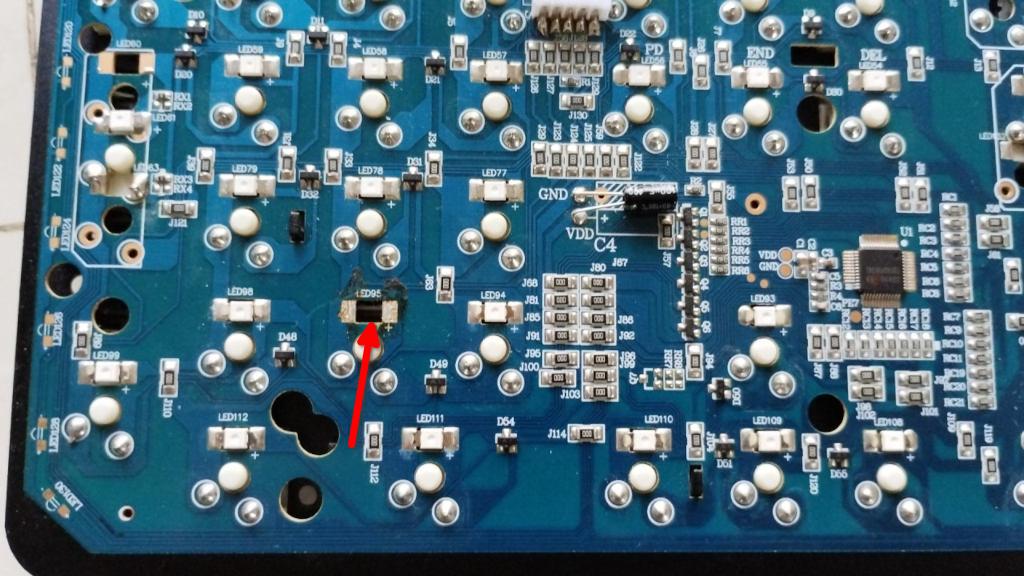
Now, if I try the same on the two problem causing LEDs, I was getting a very low voltage drop and they were not glowing. One of them was reading 1.09V and the other was reading 0.61V!
What am I supposed to do now? Buy a couple of purple LEDs in SMD form factor and replace the broken ones? They are available at a pretty cheap price, so that is not an issue. For example I could buy a 20 pack for just Rs. 50. But the bigger questions is whether I can fix it?
Well, I could give it a try, but first, I wanted to see if I can even remove the broken LEDs from the PCB. I did not have the right soldering tip to do the job but I went ahead anyway. After struggling with a desoldering vacuum pump and desoldering wick for several minutes trying not to damage the sensitive traces on the PCB, I managed to remove one LED.
This time, instead of putting back the keyboard, I connected it just as is to my laptop, with the PCB exposed and cable dangling. I was only half expecting it to work because I was not sure if a missing LED will have some side effect because the circuit may be incomplete.
Strangely, everything worked well including the key with the missing LED. But what was even more strange was the fact that the double key problem was resolved! Pressing “/” is not causing “2” to appear. All the keys in that column are fine now. I did not even have to remove the other broken LED. Still, for good measure, I removed the other LED too.
Checked to make sure everything was working as expected and then I put back the keyboard. Now my keyboard is working like before. There is however one minor defect which is that there are 2 keys without backlight :). I can live with that for now.
In future, if more LEDs fail in the same row, I will buy those LEDs and try to replace them instead of removing. I fixed the keyboard for now, but I am sure that once a problem starts, there will be more problems coming in the future. Eventually repairs may not suffice and I will need to replace the keyboard. Perhaps this is the repercussion of going with a cheap keyboard. Perhaps a more expensive mechanical keyboard from a good brand might last longer?


